Wednesday, May 16, 2012

Bakery on Main truebar

I wish I had the free time to make my own snack bars from scratch, combining a blend of tasty foods to create a healthy snack worth eating as an afternoon pick-me-up, but the reality is that I work.  A lot.  I barely see my kitchen and in the past year, I cooked snack bars twice.  Way to go, gluten and dairy free blogger, way to go.

Thankfully, several companies understand my dilemma and have created bars that I probably cannot top with a homemade version.  In high school, I religiously ate a granola or another protein-packed power bar at least once a day in a desperate attempt to gain weight.  A decade later, I'm still on the lookout for a great tasting bar for a calorie boost.  I've become a connoisseur of snack bars.

Bakery on Main recently debuted six gluten free and casein and dairy free (and non GMO) truebars.  (Note: all six contain nuts and soy and made in the same facility that processes peanuts.)  They were kind enough to send me all six to sample.  I stashed them in my desk drawer at work and munched my way through the bars each day.

I've had several different gluten free bars, but most were bland or horrible tasting and/or the crunch factor made it difficult to chew.  I don't want my snack bar breaking my teeth!  Thankfully, all the truebars had a soft texture but it was disappointing to only be a few bites away from finishing.  I want more bar!! But with 150-190 calories per bar, the truebars were a welcome calorie boost to my afternoon.

The Hazelnut Chocolate Cherry Bar was hands-down my favorite.  It sounds silly, but to me it tasted like Christmas.  (Maybe having hazelnuts for the first time ever this Christmas has something to do with it...)  Since I'm turned off by anything coffee-flavored or even named, I probably would not have the Walnut Cappuccino Bar again (although I cannot find where the cappuccino flavor comes from despite reading the ingredient list a dozen times).  All of the bars were wildly different in terms of texture and flavor, which I appreciated.  It's not just "swap out this nut/fruit/chocolate for that one" - the flavors in each bar compliment one another really nicely. Bravo!

For me a product is a winner if it is convenient, cost effective, better than I can make on my own, and something I would spend my hard earned money on.  I also don't want to eat something that tastes gluten and dairy free.  The truebars are so flavorful, nothing tastes like it is missing! At $1.99 a bar (or the lower introductory price of $17.99 for a sleeve of a dozen), the price is on the higher end of what I like to pay, but still reasonable.  Bakery on Main is fantastic about providing coupons so I can almost always save money at the store.  The bars are great to store in a snack drawer at work, in a backpack, or lunch box.  I always carry at least one bar in my bag and the truebar would be great for a snack on the go.  Worth buying?  I think so!  I loved them!  There are lots of different flavors to choose from - you are sure to find a favorite!

Have you tried the truebars yet?  What's your favorite?

Thursday, May 10, 2012

Two Fat Guys Barbecue Sauce

Throughout my almost two years being gluten free, my dad has told me about and purchased for me to consume later exactly one gluten free product.  Don't get me wrong, he makes sure that I always have more than enough gluten free foods and crackers and dairy alternatives at his house.  But only once have I gotten a "Hey, I think you should try this! I like it and it is gluten free!" food from him - Two Fat Guy's gourmet barbecue sauce.  Their flavors are Milk, Smoky, Spicy, and Lava Hot.  Since I come from a family of gringo stomachs (we tend to love plain, white people food), mild is as hot as we get.

At the gluten free expo, I met the legendary Two Fat Guys.  My dad normally sees them (and buys plenty of jars) at the Kane County flea markets, but their products are available in stores and online as well.  At the Gluten Free Expo, I was fortunate to receive a jar of the mild sauce to play with in the kitchen.  The ingredients are simple enough - I can pronounce everything - including the ever important "gluten free beer"!  The sauces are gluten free, high fructose corn syrup free, fat free, and cholesterol free.  The mild does contain honey, so it is not vegan.

As for the taste?  A heck of a lot better than the barbecue sauce I make!  It is full of flavor and I embarrassingly found myself licking my plate clean.

The website for Two Fat Guys has some recipes to try, but that day I was craving meatballs.  Google searching kept pointing me to using frozen meatballs in a crockpot with some store bought barbecue sauce, but frozen meatballs are out.  Homemade is always better, especially when considering all the wheat and dairy fillers in traditional meatballs and the over priced allergen friendly options.  I made a few variations to my default meatball recipe and doubled it up.  I had more than enough to eat, so froze the leftovers for easy lunches in the future.

The Two Fat Guys Barbecue Sauce plus one skinny gluten free foodie translates into: Inner Fat Chick's Meatballs!  These are sweet, flavorful and difficult to resist!

Inner Fat Chick's Barbecue Sauce Meatballs

1 cup of finely crushed gf crackers (I used Crunchmaster's multi-grain crackers)
1 t Worcestershire sauce
1/2 cup water
1 small onion, finely diced
2 large eggs
Salt and pepper to taste
2 lbs of 80% lean ground beef
1 18oz jar of Two Fat Guy's barbecue sauce (I used mild)

Preheat oven to 400 degrees.

In a large bowl, mix the crackers, Worcestershire sauce, water, onion, eggs, salt and pepper together with a fork.  Then (with very clean hands) add in the ground beef and roll into meatballs.
Place meatballs in a 9x13 pan.
Pour 1 jar of Two Fat Guy's barbecue sauce over meatballs, making sure the meatballs are coated with the sauce.

Cook (uncovered) until no longer pink in the center, about 25 minutes or so.


Enjoy as an easy appetizer (just add a toothpick to each meatball), with a side salad, with rice noodles, with mashed potatoes, or simply on their own!  These freeze and defrost exceptionally well.

Monday, April 30, 2012

Goat Cheese Asparagus Tart with Chebe

Don't get angry.  Get even.

I have been turning to Pinterest for recipe ideas, especially for foods on my limited low-fructose veggie list.  The tall stalks of asparagus was calling my name at the grocery store, but no recipe came to mind.  I bought them anyways and upon arriving home, turned to the Pinterest.  Every other picture was of an asparagus and cheese tart (such as the one found here).  I hate to admit, but I was really angry that I could not eat it.
 
I was starting to try to "get over it" like a mature adult, when I spied a box of Chebe Focaccia Mix.  At the Gluten Free Expo, Chebe was kind enough to give me some boxes of their dry mixes to review.  Their products are naturally gluten free and are tapioca flour based.  And actually the dry mixes are free of pretty much all the common allergen culprits.  We have a winner!  Time to get even!

I followed the recipe on the box of the Chebe Gluten Free Focaccia Mix (also available online here), ignoring the optional cheeses at the start.  Once my dough was spread out in my 9" pie dish, I added about 5 ounces of cheese goat cheese and carefully layered a few broken stalks of asparagus.  I drizzled olive oil on everything and then topped it with some sea salt and fresh ground pepper.  After 35 minutes in a 375 degree oven, my asparagus tart looked and smelled delicious.
How was my gluten and cow's milk free version of the previously taunting tart?  Wonderful!  The dough, by its nature, isn't very puff pasty like, but it was strong enough to hold the weight of the cheese and asparagus without any issue. It was slightly chewy, but still an excellent taste (the rosemary and basil in the mix really amps up the taste, too!)  This was an excellent way to make bread, plus I was able to easily add some calcium and veggies into my diet.  Unlike other gluten free dough, Chebe's dough is very easy to work with.  I mixed it for about a minute in my Kitchen Aid and then kneaded for about two or three minutes by hand before placing in the pie dish.  Another great part?  This version was done MUCH faster than the gluten-filled puff pastry original would have taken!
Thanks, Chebe, for helping solve my Pinterest-recipe-envy!

NOTE: not everyone on a dairy or lactose free diet can tolerate goat cheese.  I am fortunate goat and sheep cheeses agree with my stomach , even though I cannot tolerate even a teaspoon of (cow's milk) butter on vegetables.

Follow me on Pinterest! http://pinterest.com/windycitycookin/

Sunday, April 29, 2012

Planting a City Garden

I do not have a square inch of grass to my name but I want a garden.  I have access to my building's roof, but I have not found a practical way to get a hose up there or a way to prevent those pesky Chicago pigeons from feasting.  Last year, I moved into my new home in June so did not have time to really plant much.  My herb planter filled with dirt tumbled on the carpet on my way out of my old studio apartment, the two plants my mom bought me never grew their veggies, and then my topsy turveys tumbled down and broke the plastic chain (note: ONLY use strong, metal chain with those things).  2011 was not my year for gardening.  But 2012 is my Green Thumb Summer filled with city gardening, starting with a change of venue.
The best sunlight is from my private bedroom patio.  Per my mom (the expert gardener), I shouldn't try to grow anything on my back porch again.  The french fry smell lofting over from McDonalds probably was killing any nutrients my veggies would have grown anyways.  And after last year's pathetic attempt at growing more than a dozen cherry tomatoes, I did not need much convincing.  As soon as it got decently warm outside, I painted the cement on my front patio and started plotting where everything would grow.  I filled eight pots with dirt and started dividing up the seeds.  With a few new seed packets and some plastic baggies with seeds from Mom, I got my hands dirty and plopped a few seeds into the small holes in the dirt.  Add water, add sun, and a week later, all eight plants are blossoming.  This year, I will be enjoying (short n' sweet) carrots, green ice lettuce, spinach, gourmet blend lettuce, lollo rossa lettuce, Armenian cucumbers, beets, and muncher cucumbers.  I am using Burpee seeds - I had no idea how successful the seeds would be so I probably put too may seeds in each hole.  Over 95% of the seeds have grown!!!

Sunlight helping these seedlings turn to food! Day 7.
Cherry tomatoes and bell peppers will be growing in the Topsy Turveys this year.  There is more to come once the plants move outside.  I'm going to grow Swiss Chard and green beans, too!  After Mother's Day (once I pick up the rest of my small pots), I will grow a variety of herbs.  What a great way to save money!  Since I waver between being awesome at following a low fructose diet and eating frosting covered cupcakes, having a garden will allow me to pick only the vegetables I need, rather than have an abundance from the store.  Plus, does anything really beat homegrown food?  If I can do it in the city with limited space, anyone can!!!  Get growing!

Sunday, April 22, 2012

Nourished 2012 - Top 15 Takeaways

You're supposed to live life without regrets, right?  Well at Nourished, the first ever gluten free blogger convention in Lombard, IL started off with a big one.  Why in the world did I not bring my laptop?  I was envious of the other bloggers maximizing on the perfect social media opportunity.  My tweets came from my phone (and it was easier to text-tweet rather than spend a minute having my phone try to load the Twitter page - sorry I was so non-conversational on Twitter!)  My other big regret?  I could not be in two places at once.  There were always two very exciting workshops to attend.  I felt horrible for ducking out of the food writing one, but as soon as the introduction announced the speaker's book, I realized that I read her book a few months earlier and rudely ran to the other room to learn about social media, something the I can't learn from my Chicago Public Library education.  During the presentations, I went old-school journalist and took a LOT of notes and even photographed the slides to give my hand a break.  Not since my stage management days have I written so many notes so quickly!


I have a lot I want to mention about how fantastic and wonderful and life-changing Nourished was.  In order to prevent a novella entry, I'm going to limit it to the top fifteen things I learned from each presenter  (in order of appearance.)  My blog is going to be changing and growing better than ever in the coming months.  One of the things I rushed home to do was build a lightbox.  Now my food photography (taken after working a +10 hour day at a law firm in the late evening) will look so much better!


Creating a Strong Blog Brand with Mary Fran Wiley
  • You are your brand.  Your brand is your blog.  Your blog is you.
  • Translate you and your personality into a brand.  Your brand is your voice.
  • Who are you?  Figure it out, embrace it.
  • Be awesome at one thing instead of just okay at everything.
  • Your personality is important - be consistent, share your opinions and views, put yourself out there.  People will support your opinion.
  • Tell the whole story.
  • Get out there! Join the conversation, connect with people.
  • Be humble.  Say thank you.
  • Have a logo.
  • Think about your blog design.  Do not have it look like it was done in Paint or use Comic Sans.
  • Don't be afraid to evolve.
  • Be a peacock in a sea of pigeons.  (If you are writing a blog, you are a peacock.)
  • Have fun!  Be authentic!  Love what you do!
  • Be proud of who you are.
  • Go with your gut.  Trust yourself to know what is best for your brand.
Savvy Recipe Development with Karen Morgan
  • Keep a journal of your endeavors.
  • Make recipes better than before.
  • Know your strengths and weaknesses.
  • What is your goal?
  • If you have confidence in yourself, you can do anything. Embrace it!
  • Take risks.
  • Document everything you do.
  • Know what you don't know.  Do research.  Read.
  • Understand your ingredients and how they work and interact.
  • Gluten is the magic rubber band in baking.
  • Recipe development is very expensive.  Look five steps ahead to avoid waste.
  • What are your standards?  Same?  Better?  Better than good?
  • Test the recipe many times before it is perfect.  Once perfect, make it three times to make sure it wasn't a fluke.
  • Try multiple techniques, methods, and perspectives.
  • Let time be the revealer.  Be patient with the process.
Unconventional Food, Mainstream Appeal: Beyond Gluten-Free with Ricki Heller and Carolyn Ketchum
  • People are turned off by "contains no ___"
  • Not everyone loves your specialty diet.  Make your food more appealing.
  • Be true to your natural niche.
  • The four key aspects are: you, the food, the words, the pictures.
  • Draw people in with the words before the recipe.
  • Thing about the name of the recipe - that is the first thing people see.  Use adjectives to "punch up" the titles.
  • 650 words is optimal for most posts.
  • Specialty food is not photogenic.
  • Mix it up with regards to recipe length and complexity.
  • Make the food easily accessible to your readers.
  • Gluten is magic, add protein instead, such as Greek yogurt or eggs.
  • The Internet is the best way to source ingredients.  Buying in bulk is cheapest.
  • Make photos a time investment rather than a money investment.  Play around with exposure, different settings.
  • Upload your photo with a name, rather than a string of numbers.
  • Brand yourself, but don't pigeon-hole yourself.
Food Photography Made Simple with Cara Lyons
  • There's so much more that I can eat than I can't.
  • People eat with their eyes.  Draw them in through pictures.
  • Build your own photo studio - even it it is on your dining room floor.
  • Natural light it best.  Never use your flash.
  • Bounce your light with white foam board.
  • Plating and styling - food bloggers do it all.  Put as much effort into the food as you do making it look good.
  • Shoot on a stained board with a neutral background.
  • Show raw ingredients to help people know what is in a dish.
  • A little green goes a long way - herbs, scallions.
  • Keep it about the food - how can you enhance it.
  • Use white balance settings.
  • Post processing should only take a few minutes.  Take good pictures upfront.
  • Square pictures a more visually appealing.
  • Always light from the side of the back.
  • Use the macro setting for food photos.
How to Grow Your Blog Through Social Media with Melissa Jennings and Suzanna Florek
  • Social networking now accounts for 22% of all time spent online.
  • Interact with your followers.
  • Create an atmosphere where your readers are involved and engaged.
  • Consider a schedule so your readers will anticipate it.
  • Add social media buttons.
  • Have a Facebook fan page.
  • Readers need to relate to you and your brand.
  • Watermark all your photos with your URL,
  • Pictures make people want to eat your food.
  • Create keyword rich names on Pinterest,
  • Posts can go viral.
  • Give something to your readers that is yours.
  • There are lots of different ways to love food.
  • Social media works.
  • Use hashtags that make sense.
Nourishing Others Through Food with Cybele Pascal
  • Cookies free of all top eight allergens are super delicious.
  • Come from something that is personal.
  • Niche is not tiny - look around - niche is huge!  It is a growing movement.
  • It is becoming more and more common to be on a non-traditional diet.
  • Food blogging is the ultimate block party.  All can come together and see everyone and what they do.
  • Embrace your niche.
  • Expand and evolve.
  • Meet a need.
  • In the past, publishers dictated what authors we see.  Now there are e-books and blogs so more writers are accessible.
  • Cookbook writers have to have a blog.
  • Open the door in front of you rather than the door you are trying to force open.
  • People struggle to find foods that are safe and delicious for them.
  • Find the hole in the market.
  • Reach out, add support, build exposure.
  • Whatever dream you have, you can make it happen.
What made your top takeaways from Nourished?  To see what other bloggers were saying, be sure to check out Twitter under the hash tag #nfbc.  Find me on Twitter - @windycitycookin

Sunday, April 15, 2012

Back from the Expo!


What a whirlwind weekend!
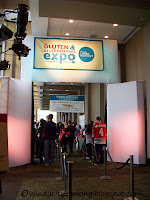
Thursday evening I headed home to Surburbia to hang out with my mom and sister to steal my mom's car for two days.  The 2012 Gluten Free and Allergen Free Expo was held in Lombard this year.  For the first time ever, there was a blogger conference on Friday and I was thrilled for the opportunity to attend.  The rooms were packed with bloggers and future bloggers nationwide!  I had a blast and met a lot of people with similar food intolerances, traded lots of business cards, and expanded the "blogs I want to read nonstop" list about fifty-fold.
Saturday was spent on my feet at the expo all day.  I volunteered as the Public Stage Attendant so was able to hear many exciting speakers share their stories and advice.  The entire afternoon was spent chatting with many vendors and three and a half hours was not enough time to talk to everyone!
Today, my mom and I shopped till we dropped and planned my city garden.  In my four foot wide space, I will be growing a nice variety of vegetables and got loads of tips from my mom: the pro who's garden can be seen from Google Earth.
There will be a longer post about this weekend soon.  But there's still bags of goodies to unpack and fill my pantry before work tomorrow!

For new readers:
In October 2008 I had an appendectomy and never felt right after surgery.  In March 2009, I went dairy free.  (I am able to tolerate goat and sheep cheeses, but have not experimented with defining my dairy intolerance so am not sure if casein, lactose, or cow's milk dairy is the culprit.) In June 2010, I went gluten free.  After many doctors and tests, I learned that I have Non Celiac Gluten Intolerance.  On the gfcf diet, I feel fantastic!  My story (really early on in my gfree life) even appeared on the Chicago news: http://www.nbcchicago.com/news/health/Gluten-Free-Diets-Help-More-Than-Just-Celiac-Patients-110238099.html 
My background is in theatre (I was a theatre and creative writing double major) but decided to give up stage management and design when I had to teach myself how to cook and eat healthier.  For me, it was too difficult to juggle a day job at a law firm, an evening job, and home cooking.  Currently, I work long hours at a law firm in the Loop so am always looking for easy lunches and healthy snacks.  I consider my culinary education ongoing: from sushi classes to cake decorating, I want to learn it all!  I have taken two Wilton classes (their buttercream is dairy free thanks to Crisco and water), my posts from class are here: http://www.windycitycooking.blogspot.com/search/label/Wilton  Last May, I did a 28 Day Healthy Eating Challenge where I went vegan and completely changed how I eat (from mostly beige to a lot of greens).  Check out some entries here: http://www.windycitycooking.blogspot.com/search/label/Healthy%20Eating%20Challenge
I'm always excited to try new products and review existing products for the gluten and dairy free communities.  I have a busy schedule, a somewhat small kitchen, and live on a budget.  Some key things I look at are affordability, preparation ease, convenience factors, taste, texture, visuals and accessibility.
I'm on twitter: @windycitycookin
And pinterest: https://pinterest.com/windycitycookin/
Be sure to follow me!
Are you a blogger?  Be sure to comment so I can follow your blog, too!

For my low fructose followers:
Oh, and some exciting news about my low fructose diet!  I met with my doctor last week.  Since I lost so much weight (3 pounds in a month and am officially "deathly skinny" by my mom's standards) and my biggest improvement was when I eliminated the two glasses of juice with breakfast mistake I had going for me rather than the solid month of maxing out with 10 grams of sugar a day, I'm back on sugar!  Everything in moderation, of course.  My new objective is to determine how much sugar is too much and stay within that healthy range.  My translation of doctor's orders: I can go back on cupcakes and cookies if I watch the sugar levels in my fruits and veggies. :-)

Sunday, April 1, 2012

Namaste Waffles

I first tried Namaste Foods' products last month.  They were dirt cheap ($3.99 a bag) at Home Goods (of all stores) and that was a deal too good to pass up!  The company is fantastic for the allergic and intolerant community - their dedicated facility is free of gluten, wheat, soy, corn, potato, peanuts, tree nuts, dairy and casein!!!  I have become hooked on their products.  Their brown paper bags contain normally twice as much product as similar products - at a lower price.

When I tried their waffle mix, I fell in love.  In mere minutes with my waffle iron, I was able to make a waffle that tasted better than the ones I would wait around 30 minutes in line for in college.  All you need is the mix, eggs, oil and water or rice milk.  Mix and pour into the waffle iron.  Couldn't be easier!  I ate one and then froze the rest, separated by wax paper.  In the morning before work, I simply threw the waffle in the toaster and instant breakfast!  Faster than pouring a bowl of cereal!  Need more reason to try their waffles?  I made them for my dad and sister and it got the sister seal of approval: "You don't even know these are gluten free!"

Another reason I am now in love with Namaste Foods - several of their mixes are sugar free.  I've made some delicious muffins and kept them fructose free and super tasty by mixing in some poppy seeds.